I am a great fan of cloud hosting as it gives me ease and control to manage my own production environment as per my need. Luckily, Amazon Web Services (AWS) offers “AWS Free Tier” by using which we can get hands-on experience with AWS Cloud Services at no charge for 12 months. So, I took the chance to test drive their services. Today I am going to write about launching and preparing my first instance on Amazon EC2 service where we will host a web application developed using PHP (Laravel).
First, we will need to login to our AWS Management Console and select EC2. We will see a dashboard like below:

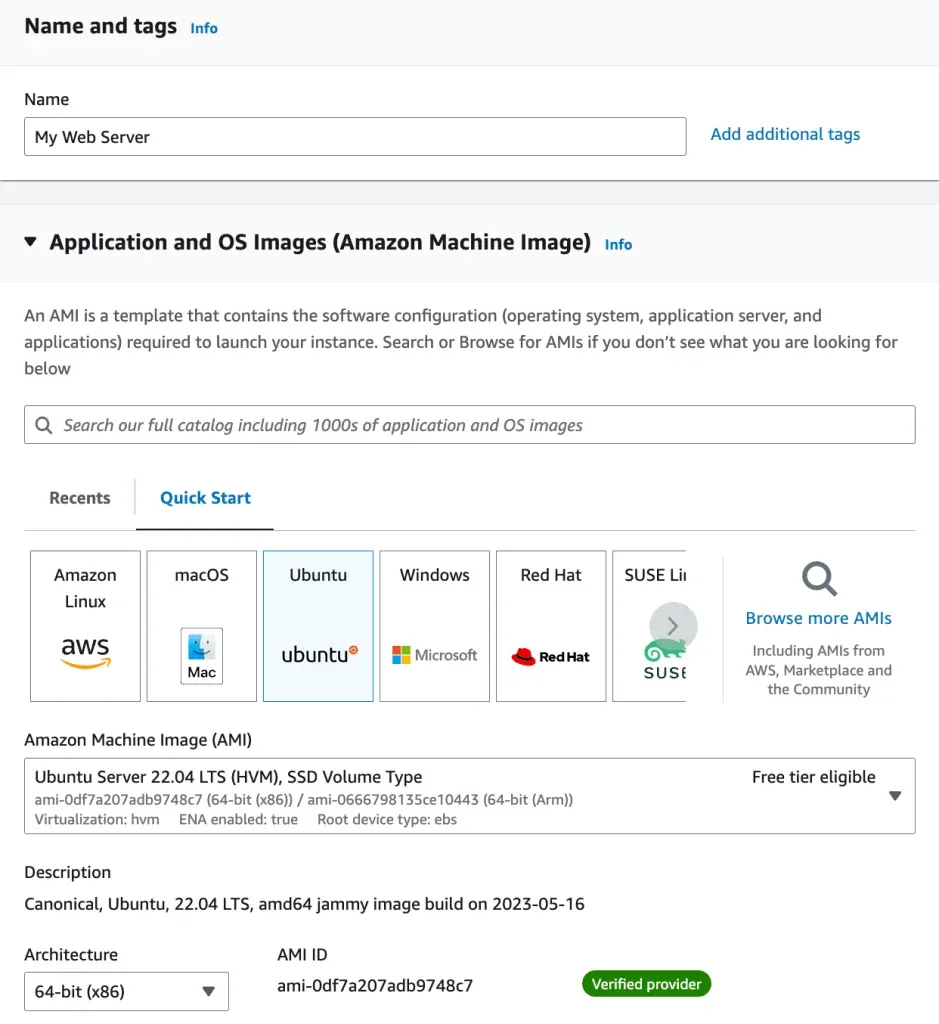
You can see lots of options there. But to launch our first instance, click on the blue “Launch Instance” button. You will then be prompted to choose an AMI to launch your instance. An AMI is a template that contains the software configuration (operating system, application server, and applications) required to launch your instance. You will also be able to set a name for your instance. Try to give a meaningful name for the instance.
I am going to select Ubuntu Server 22.04 LTS for our instance and luckily it’s eligible to use with AWS Free Tier.
Next, we will need to select our instance type. We will choose t2.micro type instance this time as our AMI is eligible to run on this instance type. You should know that free tier is only eligible for micro instances. If you are ready to afford some money to get more powerful instance, you can choose any other instance type that fits you the best.
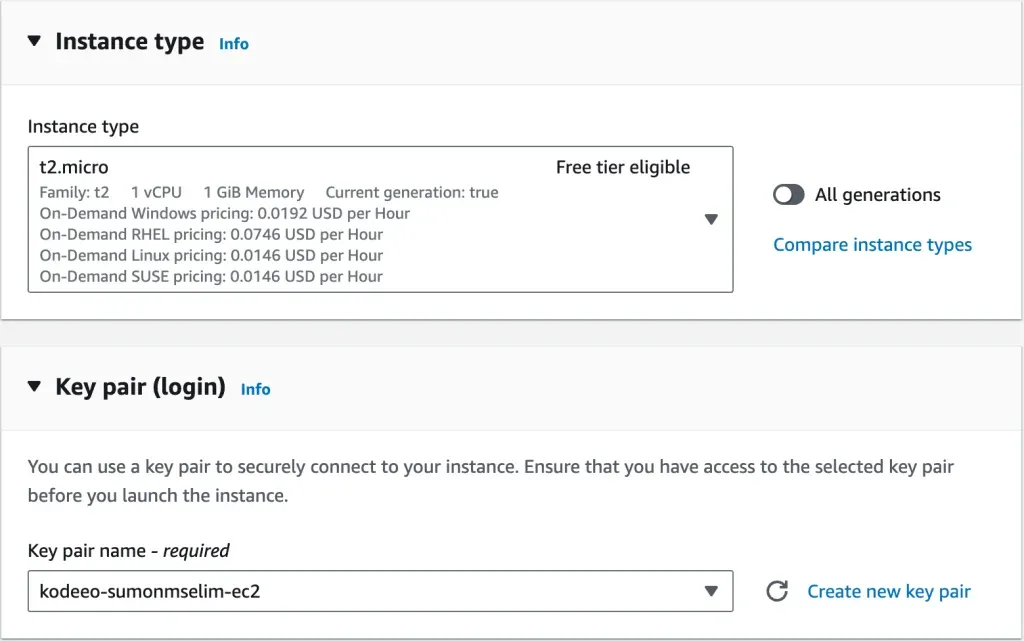
You will need to create new key pair which you will need to login to your instance. You can choose between RSA or ED25519 key pair type. Give the key pair a name and download the Key Pair (.pem or .ppk) file. Please keep in mind that you must download the private key file before you can continue. Store it in a secure and accessible location. You will not be able to download the file again after it’s created.
In the next section, we will need to set the network settings for our instance. For now, you can keep using the default VPC and use the default subnet. We will discuss more about these in a future post.
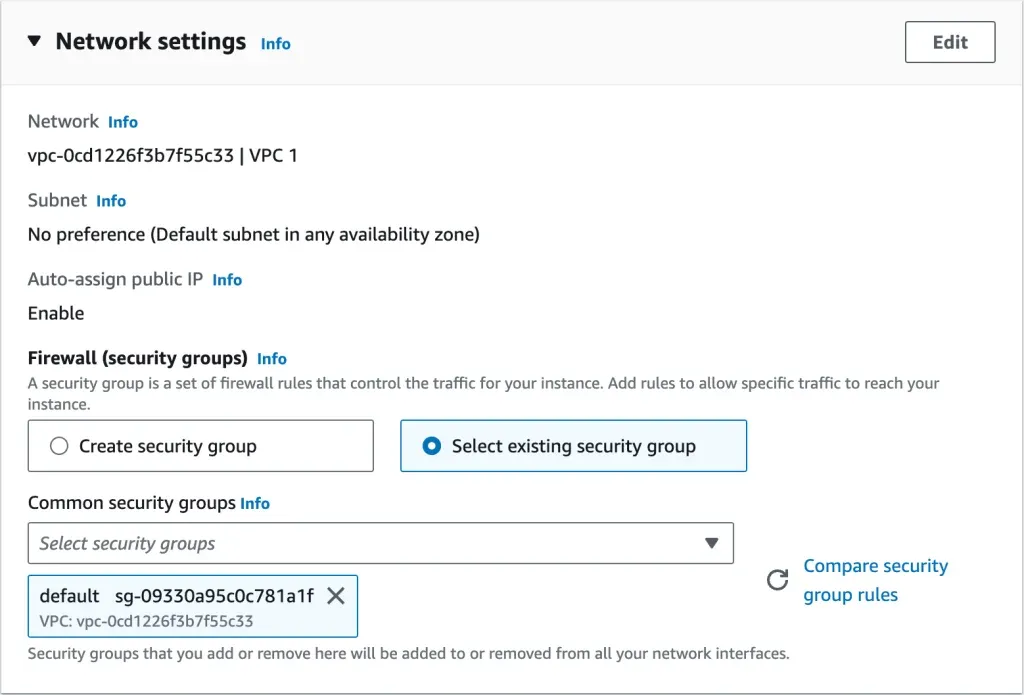
Then we will need to configure security group to set firewall rules that control the traffic to and from our instance. For now, I am going to select the existing security group which will allow all traffic to access our instance and all traffic from our instance to the public internet. Please keep in mind, it’s not recommended at all for production usage. We will learn about security and best practices in a future post. For better security, you will need to modify these rules to prevent unauthorized or unintended access.
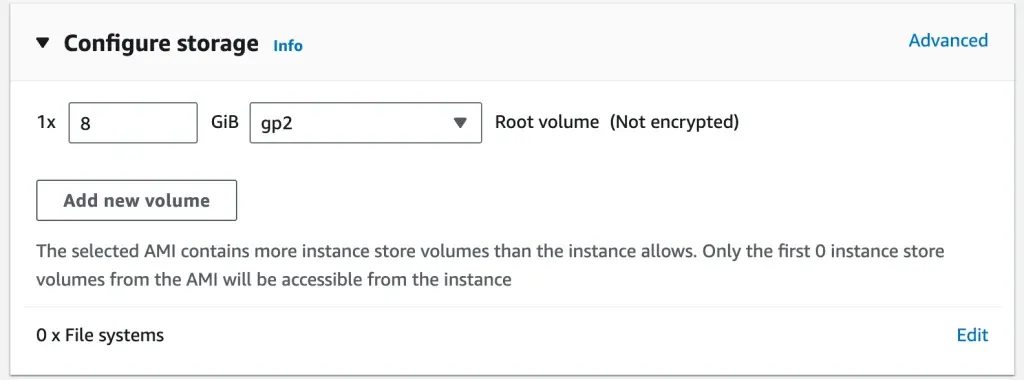
After that, we will need to add storage to our instance. For now, I will add an EBS General Purpose (SSD) volume and allocate 8 GiB of space.
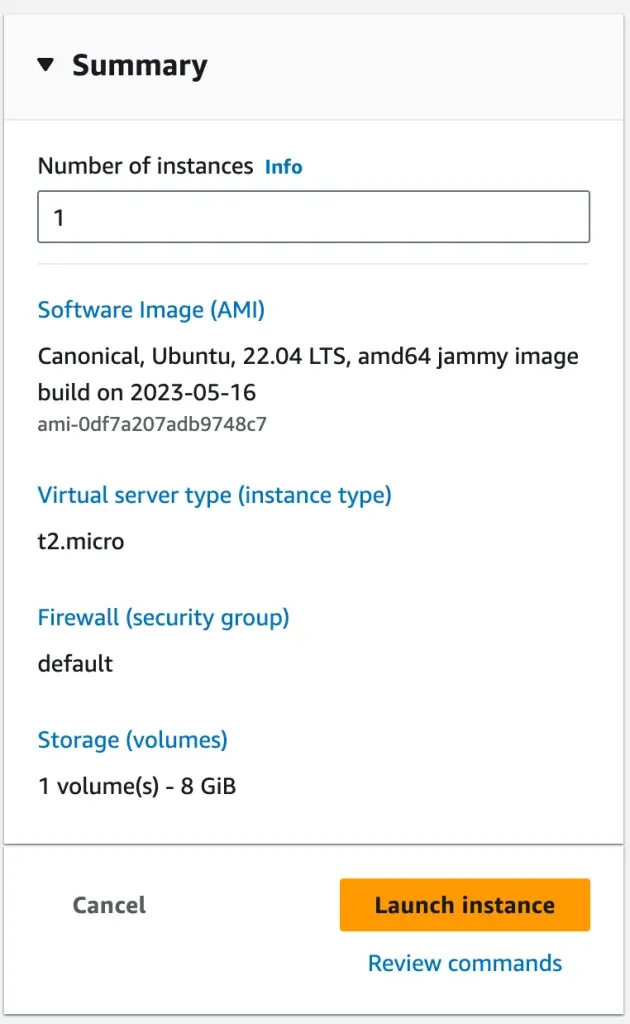
You can skip the Advance details section for now and see the summary of the instance that you will be creating. Click on the “Launch instance” button to start creating the instance. If needed you can make necessary changes, before starting the launch process.
It will take some time to complete the instance launching process. After that, you will see a page with Launch Status of your instance. Voila! You are ready with your first Amazon EC2 instance now 🙂
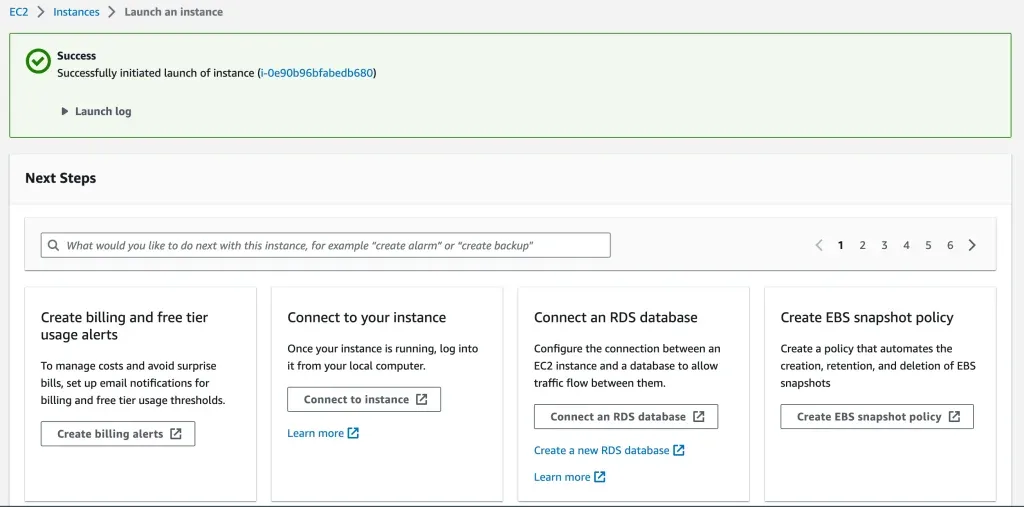
If you visit the “Instances” section now, you will see that your running instance is listed there. On our next part, we will connect with our newly created instance via SSH and install the necessary software to run a web server.